Ok, so Valentine's Day is over for another year and I'm a little behind with posting this DIY, but rather than think of it as being late, let's call this post inspiration for next year, shall we?
This Valentine's Day I'm down to just one kid celebrating with their class. That means less work for me, but it was also quite the downer knowing that my years of helping the kids with creative projects is coming to an end. Only three more years of class Valentines left.
This year we kept the valentines themselves quite simple. Mathilde handed out packs of Pocky with a simple label saying "Valentine, let's stick together". Get it? Pocky sticks? You can find the template for the labels here. We did put a bit more effort into the Valentines Box though.
Mathilde has been quite enamored with the cartoon style cakes that have been all over social media lately. You know the type - they're brightly colored with black outlines that give the impression of a two dimensional cartoon when view from certain angles. Luckily she wanted her Valentines box to look like a two dimensional cartoon rather than a cake - which would've been much more time consuming to create. Ooh... a cake Valentines box would be pretty cool though, right?
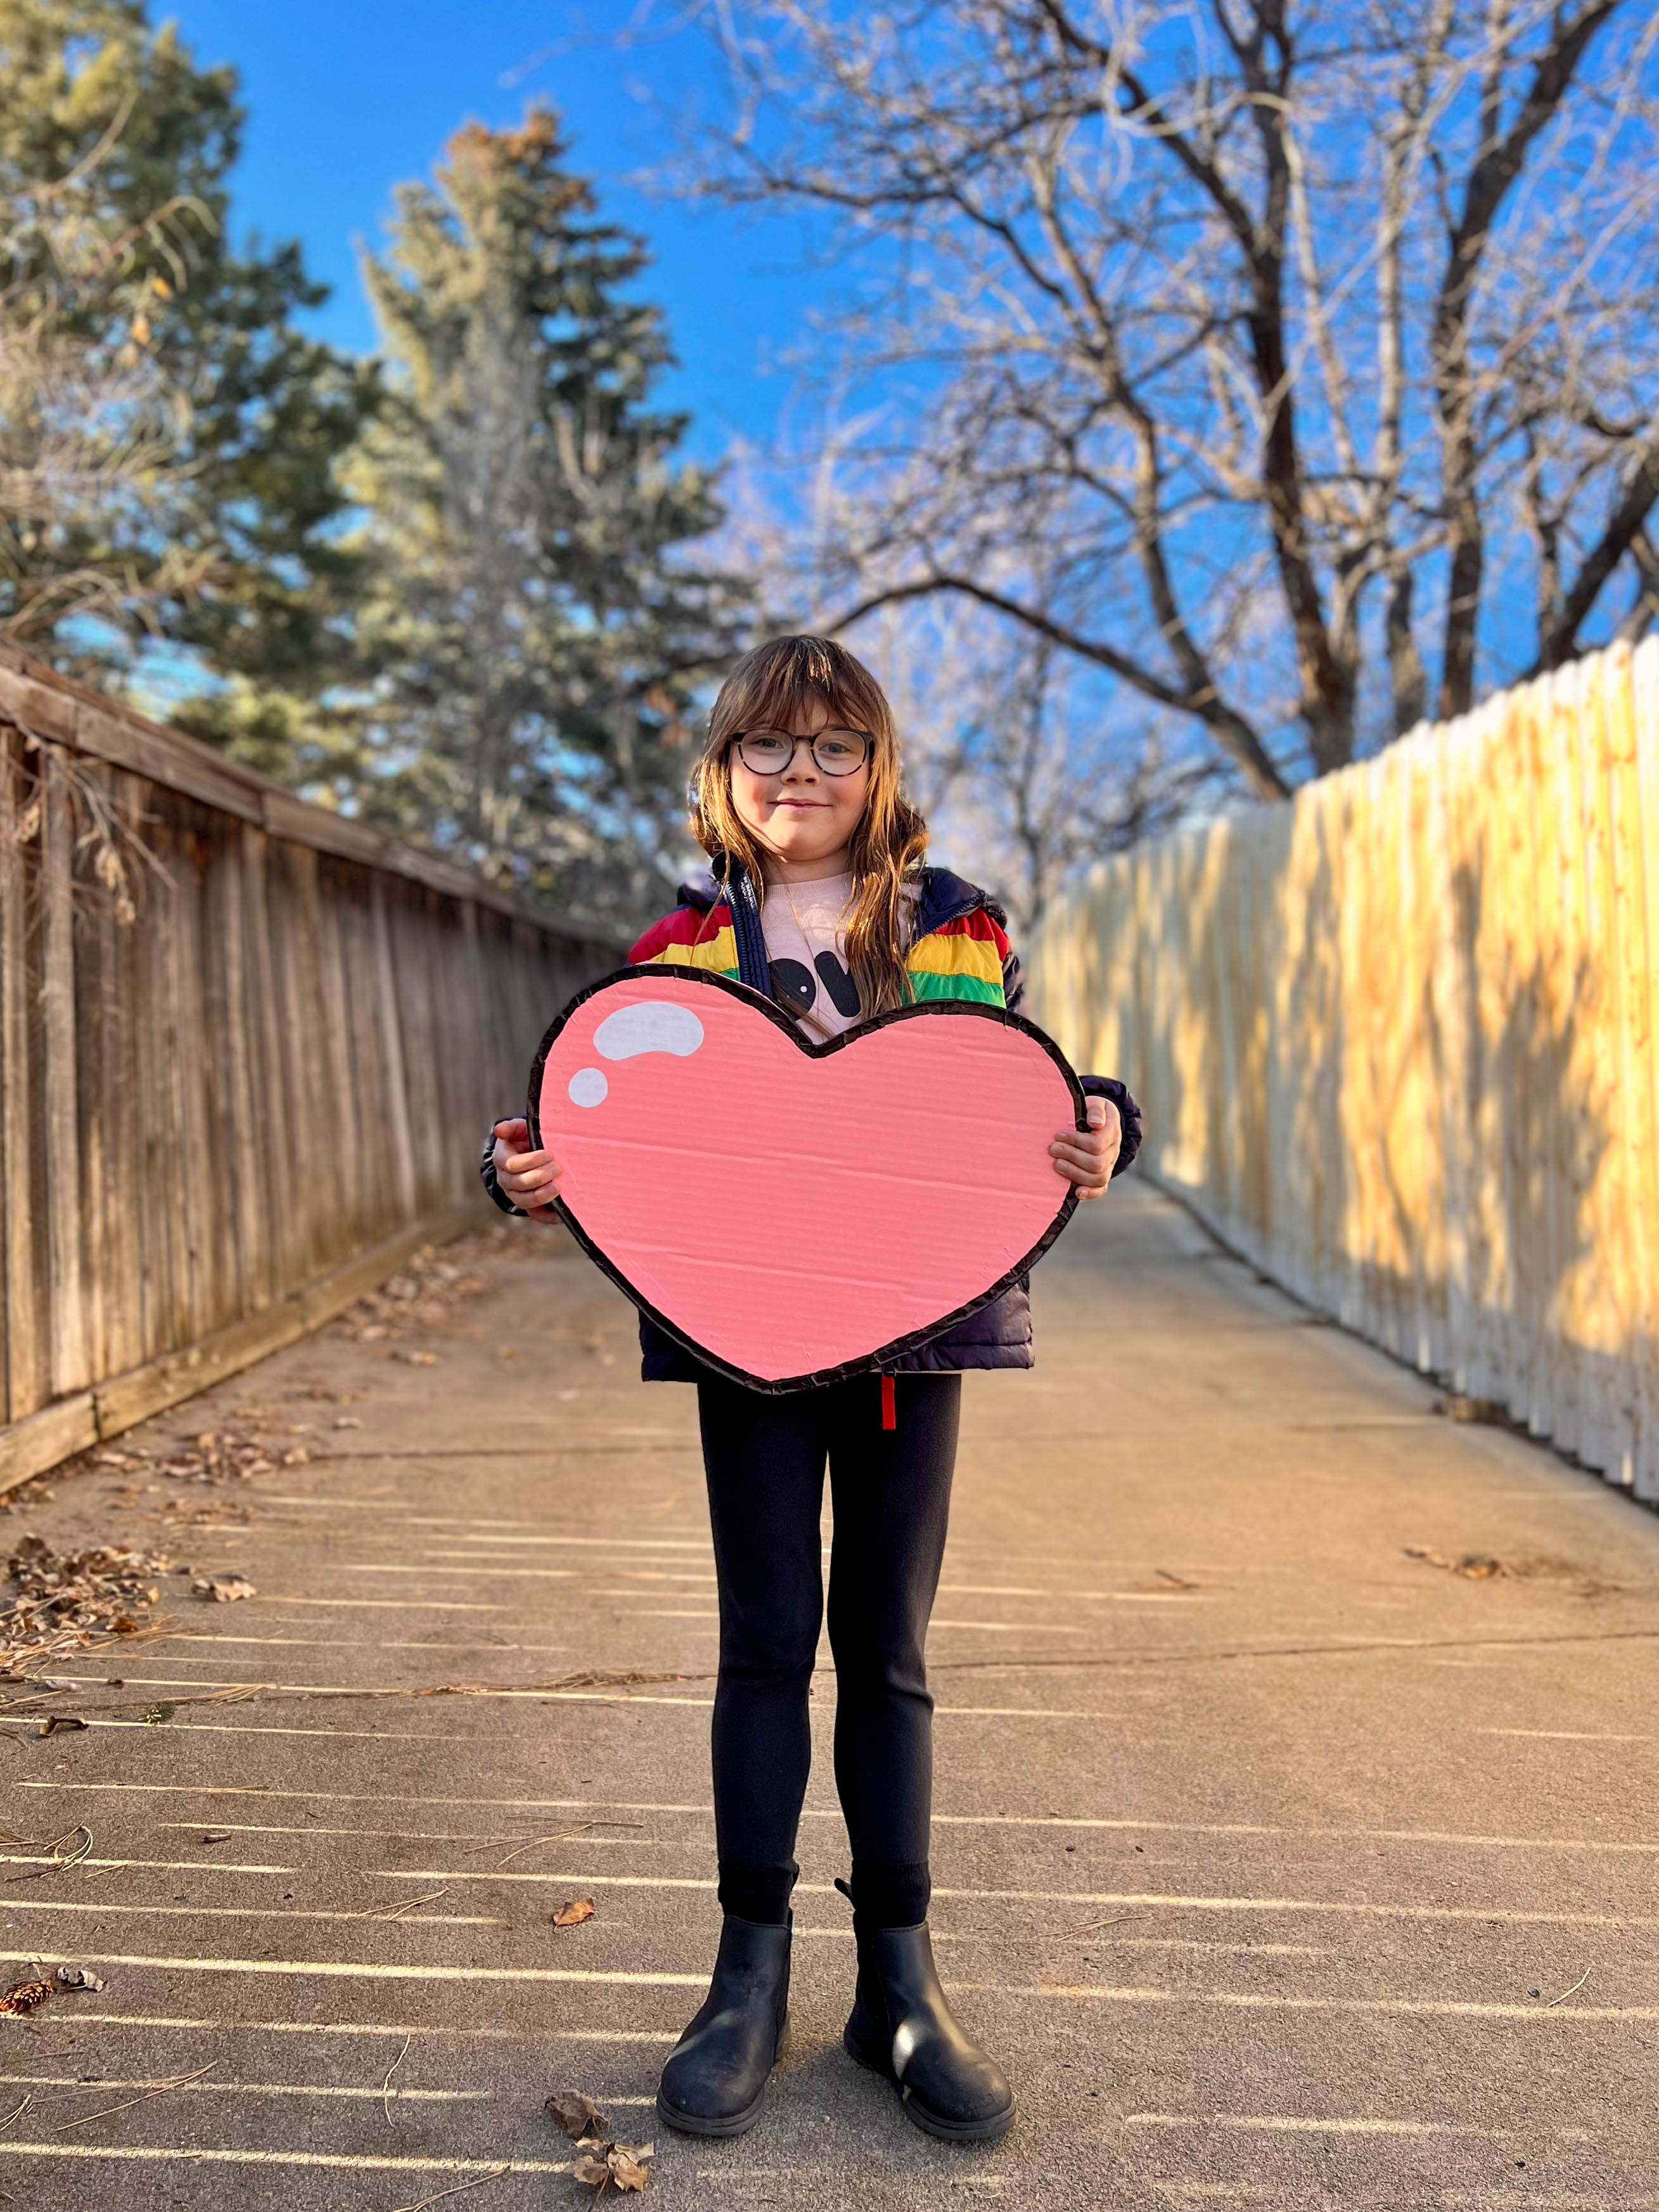
Anyway, to create this Valentines box I raided the recycling bin, grabbed some paint and tape, and got to work. If you've been here a while you'll know that I love making pinatas for the kids' parties, and this particular Valentines box was made pretty much using my regular pinata DIY but with a few changes. You can see the sort of Pinata DIY I'm talking about here. I really should post an updated pinata DIY seeing as I've made approximately a gazillion since I shared that particular DIY.
What you'll need
Large pieces of flat thick cardboard
Thin cardboard (cereal boxes and mac & cheese boxes are perfect)
Paper for a template (optional)
Masking tape
Gesso paint (optional)
Pink paint
Thick black Sharpie marker
White paint marker (or the above mentioned Gesso)
Paint brushes
Box cutter
Cutting mat
Pencil

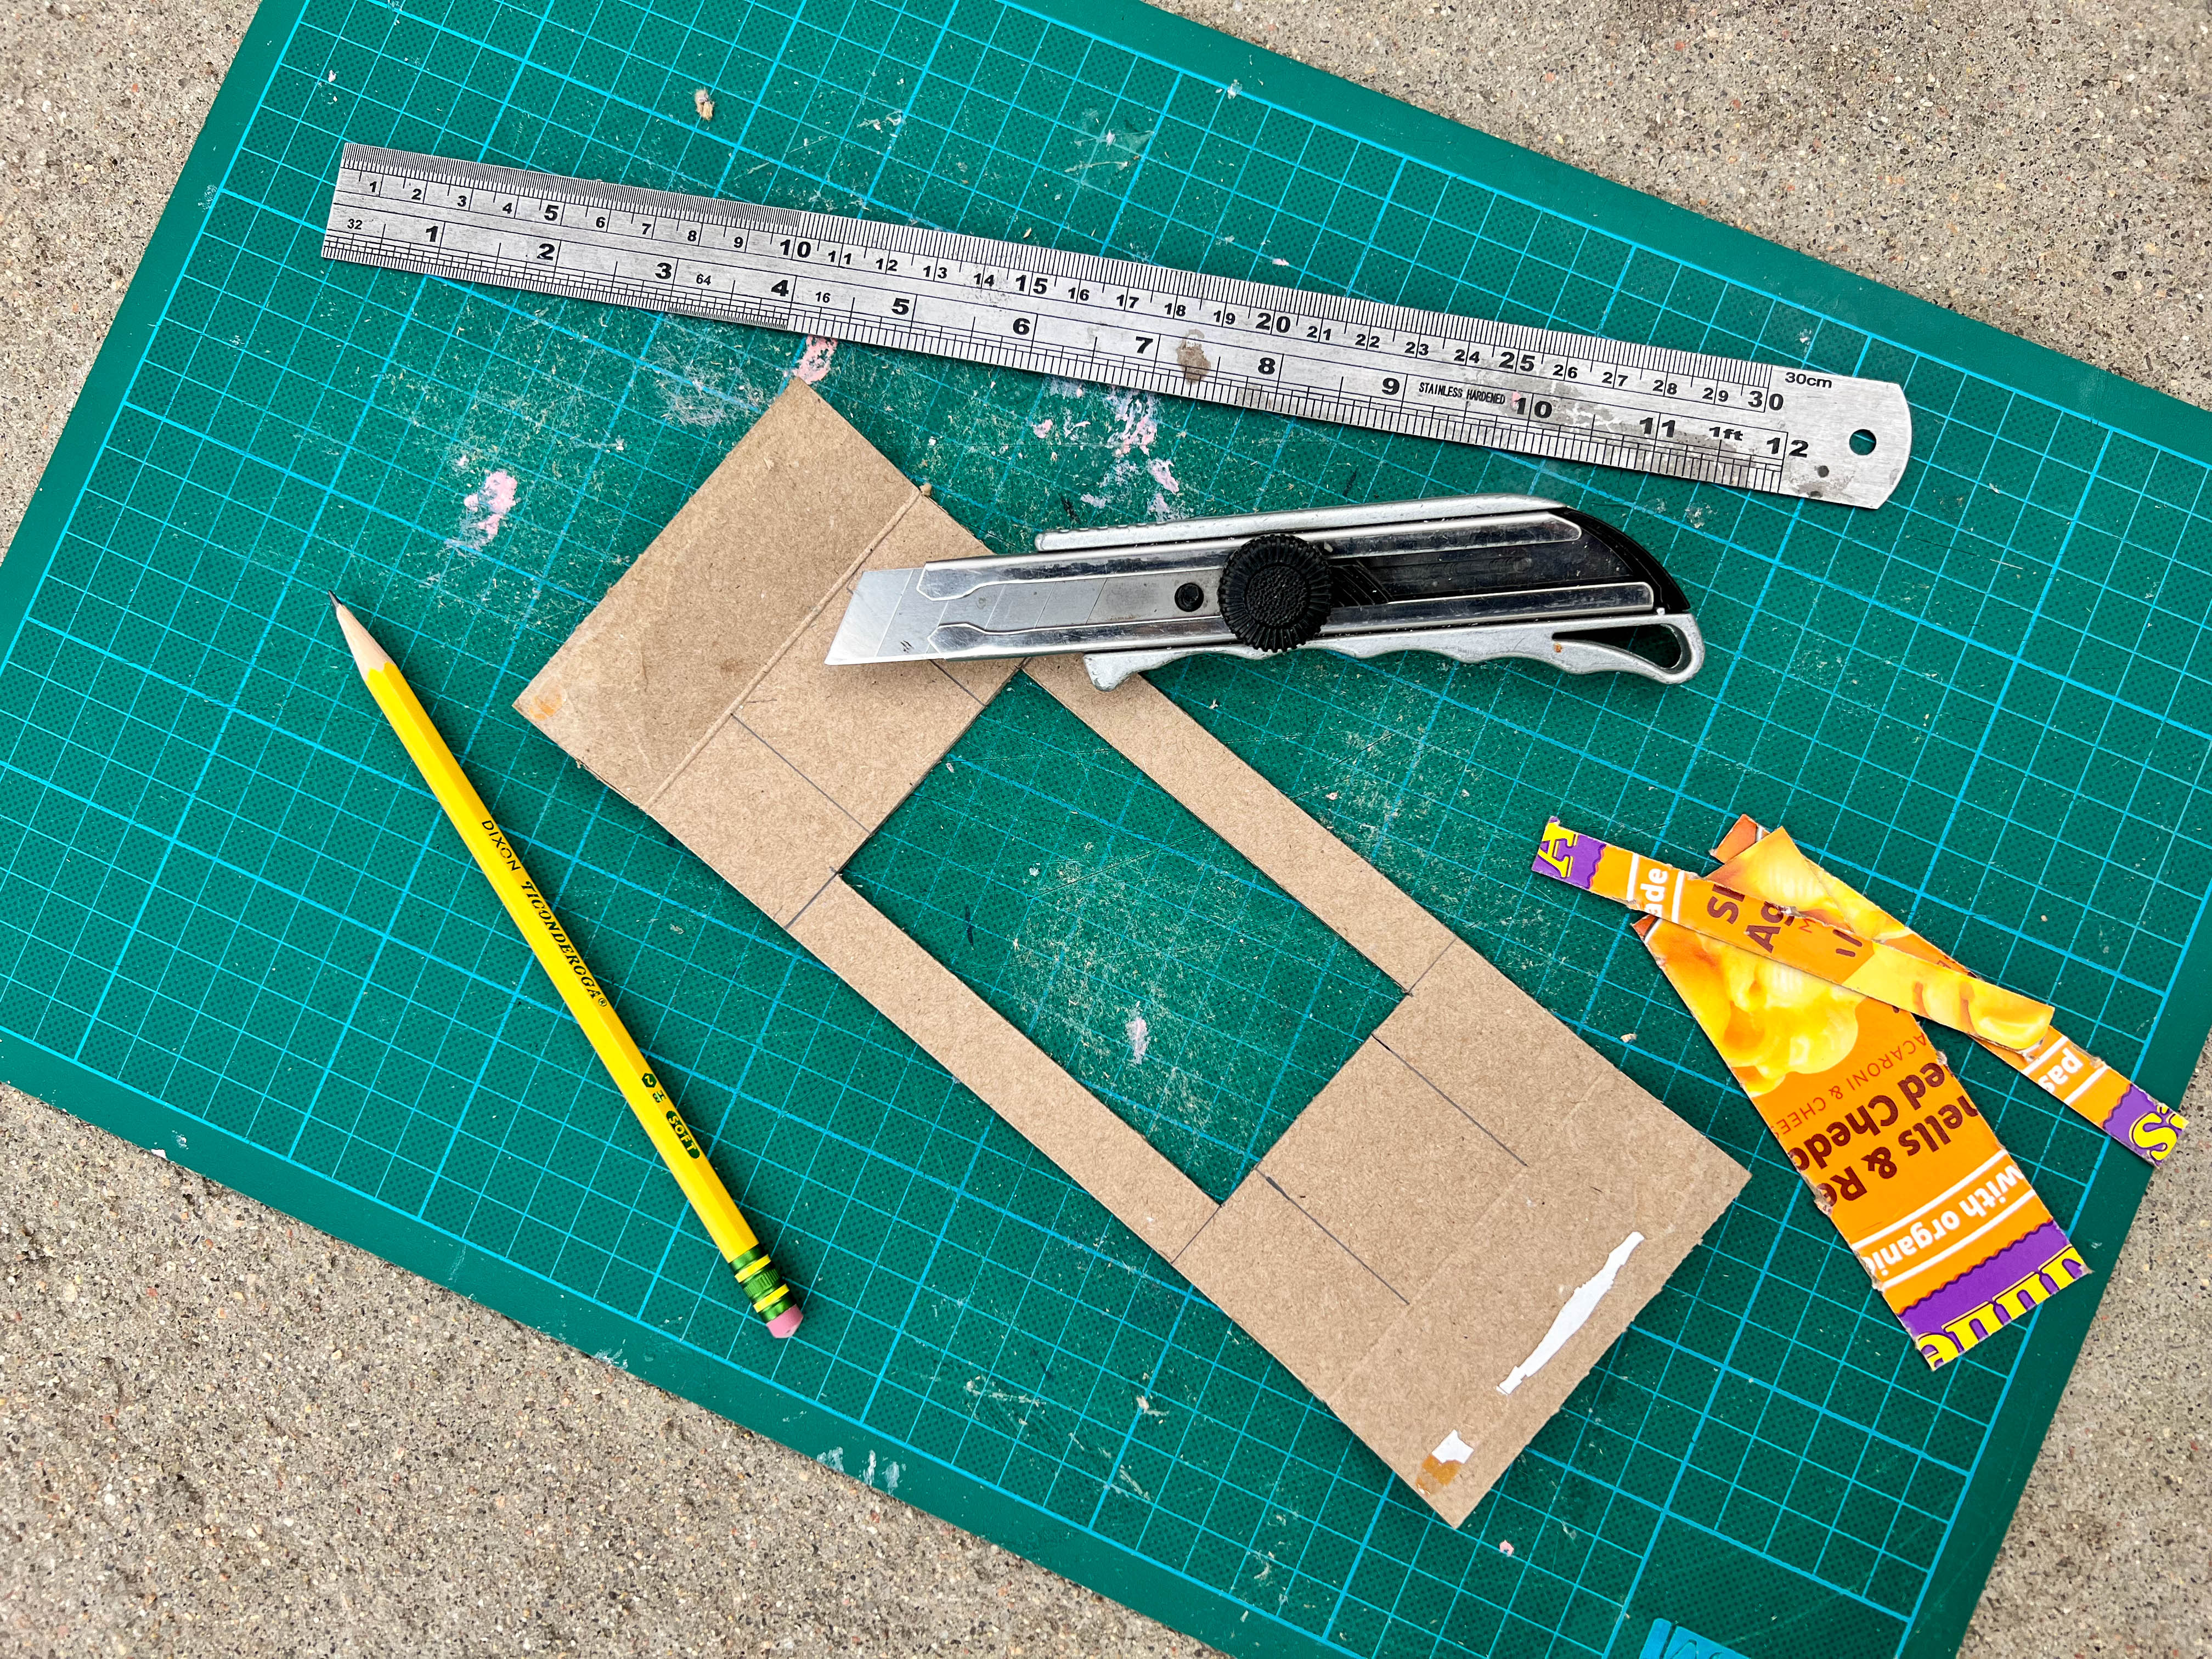
If, like me, you're not so good at freehand drawing an even heart you'll want to make a template. To make the template I taped two pieces of printer paper together and drew half of a heart, using one edge of the paper as the middle. I then traced around the template on my cardboard, flipped the template over (lining it up in the middle) and traced it again to form the second side of the heart. I then did this again to make the second heart.


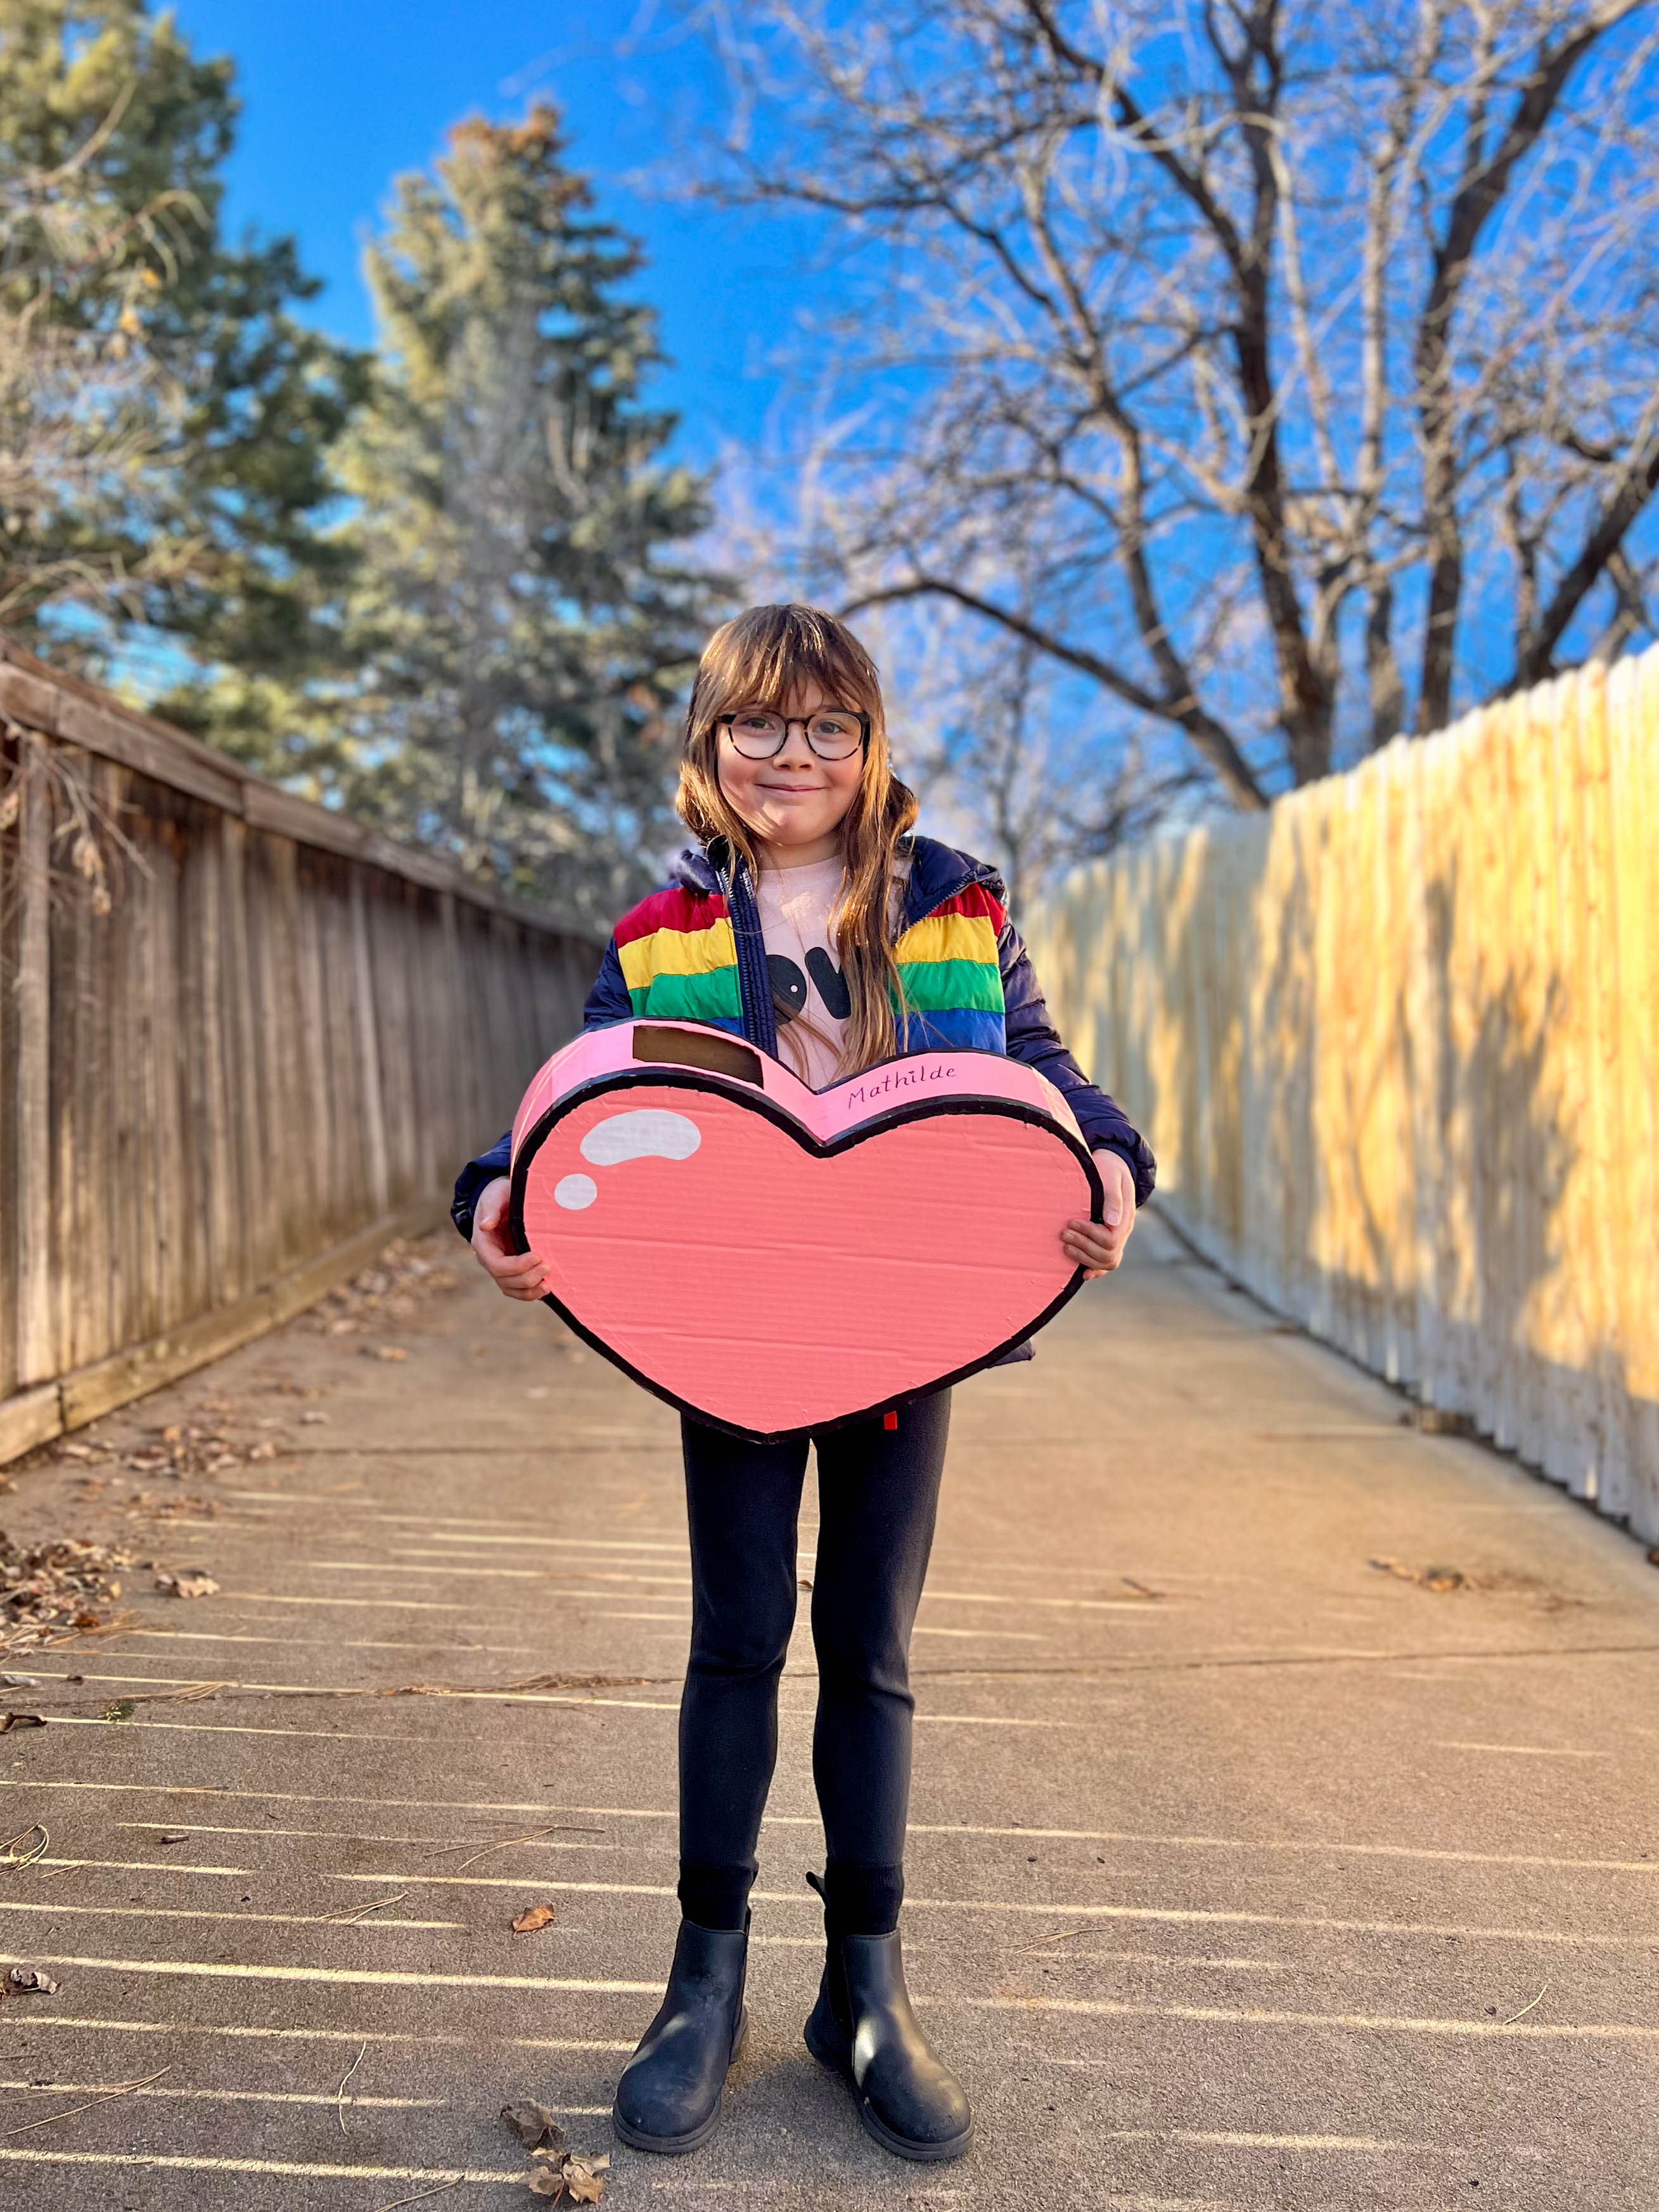
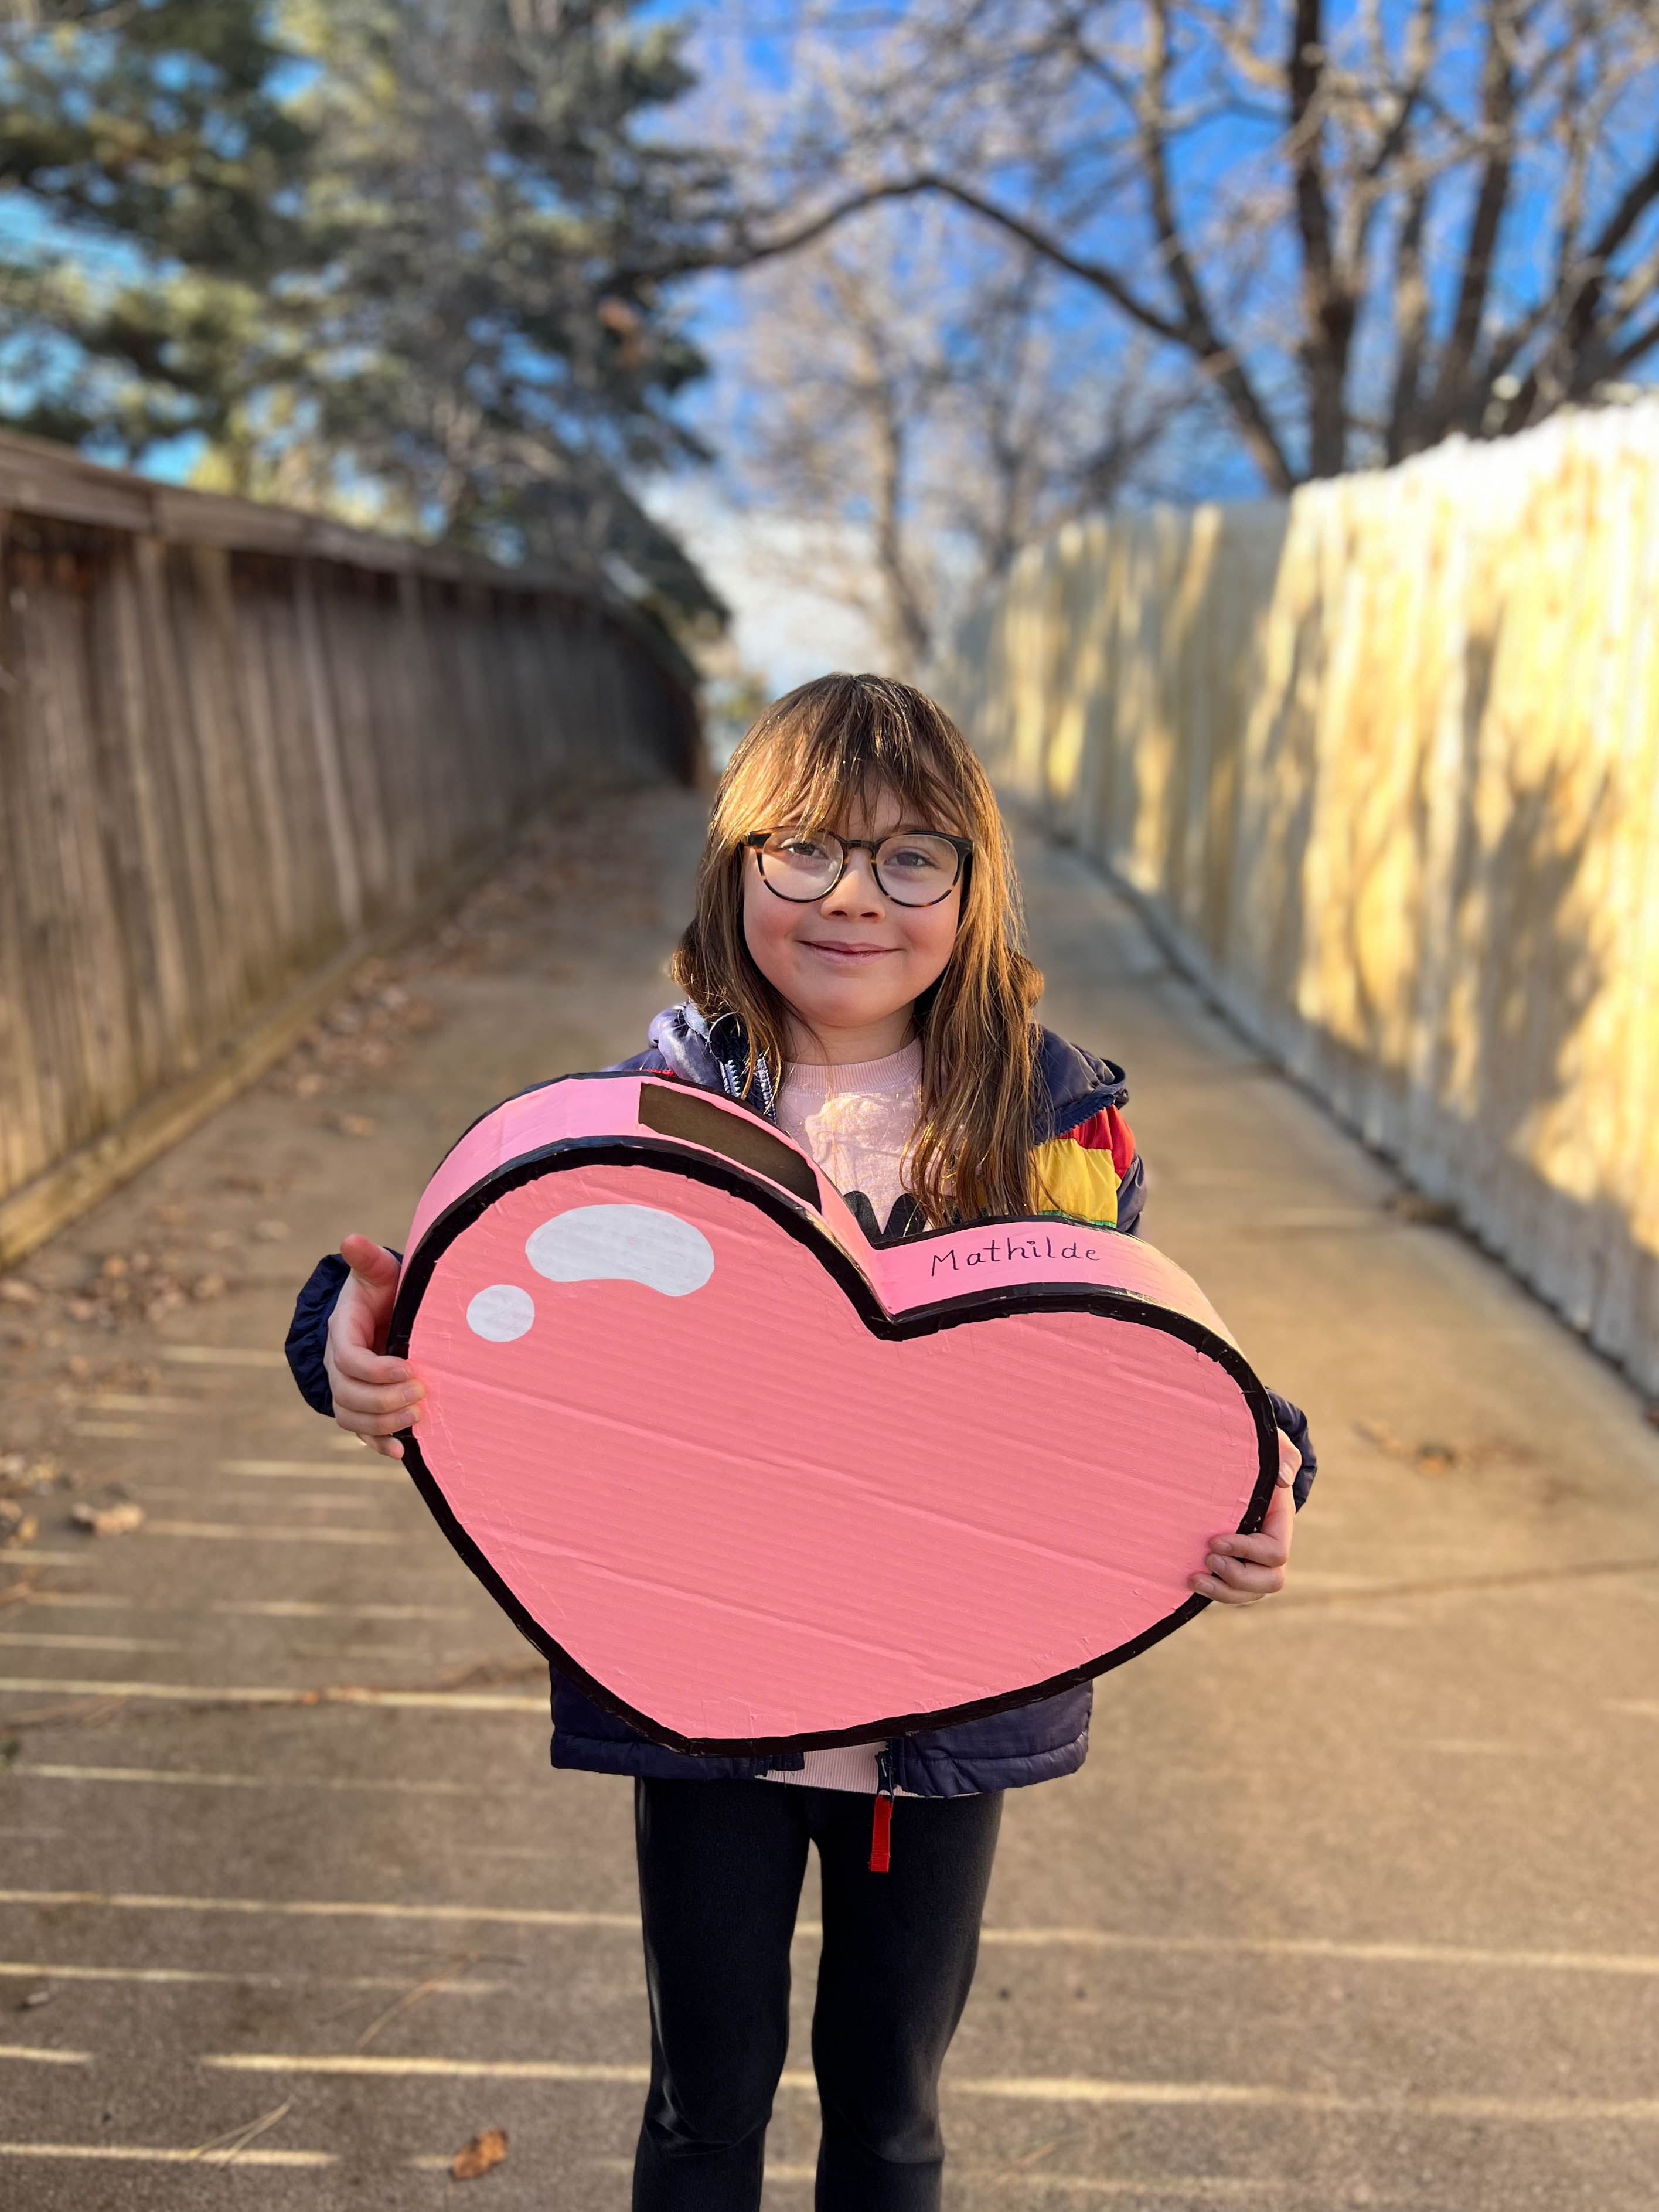
The Valentine box will need an opening, so on one piece of cardboard measure and cut out a rectangle in the middle, making sure that it's wide enough for your kid to easily reach their hand through. I made the opening 4" long by 2" wide. This was plenty big enough for me to reach my hand through.
Now to tape it all together! With the inside of the thin cardboard facing out, use small pieces of masking tape to attach it around the edges of one of the cardboard hearts. Start by just using enough tape to keep it secure and you can go back afterwards and add more tape to fill in any gaps and neaten it up. Add extra tape where the thin pieces of cardboard join to ensure it's not a weak spot. Make sure to add the cardboard piece with the opening cut out at the top of the heart. You could place it right in the middle of the top if you like, but I went with placing it to the side of the middle.


The finishing touch was adding the white highlights to give the heart more of a cartoony feel. I used a Posca paint pen to draw on the highlights but once again you could always use white paint instead. I did think about tracing around the white highlight with a regular black Sharpie (not the big thick one) but ultimately Mathilde decided she liked it better without an outline.

And that's it!
The only thing left to do was take it to school for her classmates to fill up with goodies!


I hope you had a wonderful Valentine's Day if you celebrate!


No comments:
Post a Comment